You do not need a gym to build a cardiovascular engine that lasts decades.
Most men default to treadmills and rowing machines because they mistake access for effectiveness. The truth is simpler and harder: your body, the ground beneath you, and deliberate effort are enough to build serious aerobic capacity, metabolic resilience, and work capacity that translates to everything outside the gym. No membership required. No excuses accepted.
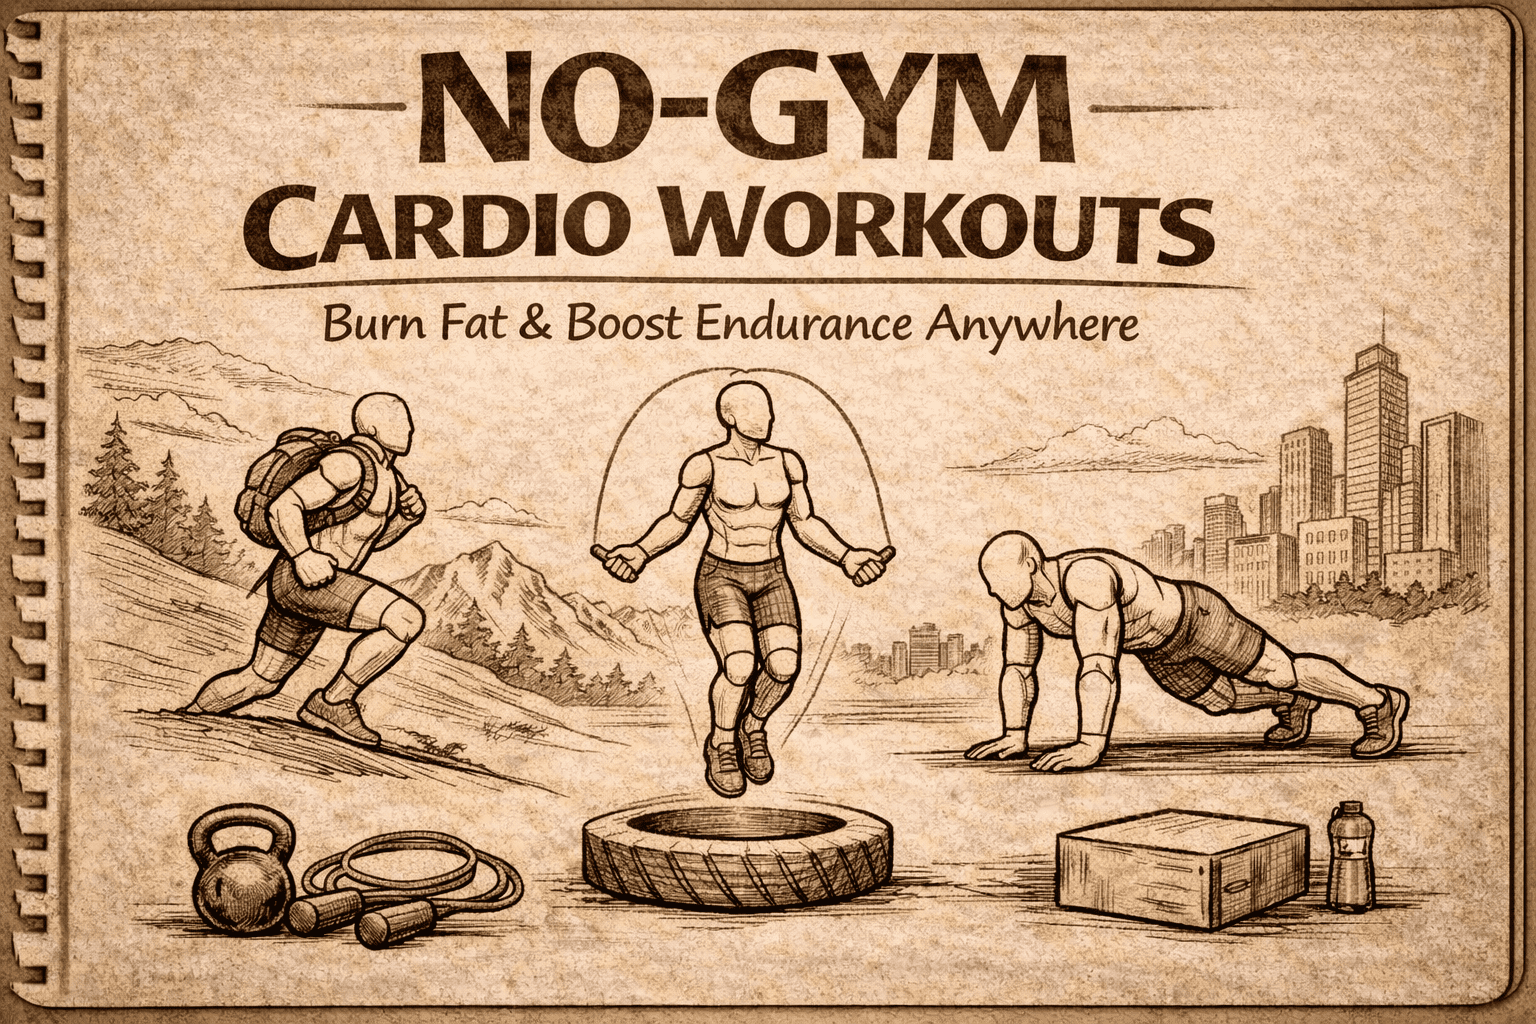
This guide delivers 15 field-tested cardio workouts that require zero gym access. Some use nothing but your bodyweight. Others leverage a single piece of minimalist gear like a jump rope, kettlebell, or loaded backpack. Each one includes intensity zone, duration, step-by-step instructions, and what it trains best.
These are not random circuits thrown together to make you sweat, they are deliberate cardiovascular protocols built for men who value durability, function, and training that fits into a life lived outdoors and on your terms.
Table of Contents
Bodyweight Cardio Protocols
These workouts strip training down to its foundation. No equipment. No setup. Just movement, breath, and intention. They build aerobic base, condition connective tissue, and teach you to manage effort across time. Perfect for travel, minimalist setups, or when you want to train in a park instead of a box.
Running Intervals on Variable Terrain
Most runners stick to flat, predictable routes and wonder why their knees hurt and their progress stalls. Running intervals on trails, hills, or uneven ground forces constant micro-adjustments that build ankle stability, proprioception, and real-world durability while spiking heart rate in ways smooth pavement never will.
Zone targeted: Zone 3 to HIIT depending on interval structure
Duration: 20 to 40 minutes
Best for: Aerobic capacity, lower body resilience, mental toughness
The shifting terrain recruits stabilizer muscles that flat surfaces let atrophy. Your cardiovascular system works harder to manage both the physical effort and the neuromuscular demand of adapting to unpredictable ground. This combination builds conditioning that transfers directly to rucking, hiking, and any movement outside controlled environments.
Structure options based on experience:
- Beginner: 30 seconds hard effort, 90 seconds recovery jog, repeat 8 rounds on moderate hills
- Intermediate: 1 minute hard, 1 minute easy, repeat 12 rounds on rolling trails
- Advanced: 2 minutes threshold effort, 1 minute recovery, repeat 10 rounds on technical terrain
Pick terrain that challenges your focus, not just your lungs. Single-track trails, beach sand, or urban stairs all work. The goal is not speed, it is maintaining controlled intensity on ground that demands attention. Your heart rate climbs, your stabilizers fire, and your aerobic system adapts to variable output instead of metronomic pacing.
Key execution point: Do not let terrain become an excuse to slow down during work intervals. The difficulty is the point. If you can chat comfortably during the hard sections, you are jogging, not training.
Start with conservative interval length and build volume over weeks, not days. Your connective tissue adapts slower than your cardiovascular system, and variable terrain loads joints and tendons in ways flat ground does not. Respect the process or pay later.
Burpee Ladders for Metabolic Conditioning
Burpees get dismissed as CrossFit gimmicks, but structured burpee ladders are one of the most efficient full-body metabolic stressors you can program without equipment. They torch calories, spike heart rate into HIIT zones, and build the kind of suffer-through-it capacity that matters when life does not care about your comfort.
Zone targeted: HIIT
Duration: 10 to 20 minutes
Best for: Metabolic conditioning, mental resilience, explosive power endurance
The ladder structure prevents the all-out death sprint that leads to form breakdown and injury. Instead, you build controlled volume across ascending and descending rep schemes that keep intensity high while managing fatigue intelligently.
Three proven ladder protocols:
Ascending ladder: Start at 5 burpees, rest 30 seconds. Do 6 burpees, rest 30 seconds. Continue adding one rep each round until you hit 15, then stop. Total volume: 110 burpees.
Descending ladder: Start at 15 burpees, rest 45 seconds. Do 14, rest 45 seconds. Decrease by one rep each round down to 1. Total volume: 120 burpees.
Pyramid ladder: Ascend from 1 to 10 burpees with 20 seconds rest between rounds, then descend back down from 10 to 1. Total volume: 100 burpees.
The rest periods are not optional recovery, they are programmed to keep your heart rate in the effective HIIT zone without redlining into sloppy form. If you are resting longer than prescribed, the ladder is too aggressive for your current capacity. Scale back the top number and build up.
Form check: Every burpee hits the ground with chest and thighs, includes a full hip extension at the top of the jump, and lands with controlled foot placement. The moment you start skipping the chest-to-ground or half-repping the jump, you are done. Log your volume and beat it next week with full reps.
Burpee ladders work because they are self-regulating brutality. You cannot fake the volume. You either complete the structure or you do not, and your cardiovascular system adapts accordingly.
Shadow Boxing Rounds
Most men ignore shadow boxing because it looks like warm-up filler, but high-output shadow boxing rounds deliver serious cardiovascular training while building coordination, footwork, and the ability to maintain explosive output under fatigue. Fighters use it as a cornerstone conditioning tool for a reason.
Zone targeted: Zone 3 to HIIT depending on effort
Duration: 15 to 30 minutes
Best for: Cardiovascular endurance, coordination, upper body endurance
The key is treating each round like sparring, not like you are waving your hands around between sets. Constant movement, sharp combinations, defensive slips and rolls, footwork that keeps you mobile, and enough intensity that your shoulders burn and your breath gets choppy.
Round structure for maximum cardiovascular demand:
- 3-minute rounds with 1-minute active rest (walk, shake out arms) between rounds
- Focus first minute on combination punching with high volume, constant hand speed
- Second minute add defensive movement: slips, rolls, level changes while maintaining punch output
- Final minute increase footwork demand: lateral movement, angles, circling while punching
- Complete 5 to 10 rounds depending on conditioning level
Your heart rate will climb into zone 3 during technical work and spike into HIIT territory when you push combination speed and footwork intensity. The beauty is the output is entirely self-determined, you control how hard you push each round based on current state and training goal.
What most people do: Lazy arm waving with minimal footwork and zero intent.
What actually works: Treating every round like you are in front of an opponent, maintaining constant motion, sharp technique, and enough speed that your cardiovascular system has to respond.
Add variety to keep your nervous system engaged. Alternate rounds focused on straight punches, hooks, uppercuts, or specific combinations. Throw in rounds emphasizing only defensive movement or pure footwork. The variation prevents mental checkout, which is when shadow boxing becomes worthless.
If you are not breathing hard and your shoulders are not fatigued by round three, you are not pushing intensity. This is not a technique session, it is a cardiovascular session using boxing movement as the vehicle. Respect the difference.
Stair or Hill Sprints
Stair and hill sprints are old-school conditioning that never stopped working because they combine maximum cardiovascular demand with zero-impact eccentric loading, explosive power development, and glute and hamstring recruitment that flat sprints never touch.
Zone targeted: HIIT
Duration: 15 to 25 minutes including rest intervals
Best for: Explosive power, posterior chain strength, anaerobic capacity
The incline removes the pounding impact of flat sprints while forcing your glutes, hamstrings, and hip flexors to do the work gravity usually handles. Your heart rate spikes immediately, your breathing becomes a priority, and your legs learn to produce force under metabolic stress.
Execution protocol:
Sprint phase: 10 to 30 seconds of maximum effort up stairs or steep hill (aim for 20 to 40 steps or 30 to 50 meters of incline). Drive through the balls of your feet, pump arms aggressively, maintain forward lean.
Recovery phase: Walk back down slowly, focusing on controlled breathing and full recovery. Rest period should be 2 to 3 times the length of the sprint (20-second sprint gets 40 to 60 seconds rest).
Volume: 8 to 15 sprints depending on conditioning and incline difficulty.
The walk-down recovery is not wasted time, it is active recovery that keeps blood moving, prevents pooling, and allows your nervous system to reset for the next high-output effort. Skipping it or rushing back up turns this into junk volume that trains nothing but poor decision-making.
Terrain selection matters: Stadium stairs, outdoor staircases, and steep hiking trails all work. Avoid uneven or slippery surfaces where a misstep at max effort leads to injury. The goal is explosive intent, not navigating obstacles.
Critical warning: If you have knee issues or are returning from injury, this is not your starting point. Hill sprints load the knee joint under high force, and poor mechanics or inadequate preparation lead straight to pain and setbacks.
Start with conservative volume. Six quality sprints at true max effort beat fifteen half-hearted reps every time. Build total volume across weeks as your body adapts to the neuromuscular and cardiovascular demand.
Sprawl to Broad Jump Intervals
This combination movement pattern delivers explosive lower body power and full-body metabolic stress in a single drill. The sprawl hammers your core and conditioning, the broad jump trains explosive hip extension, and the pairing creates a cardiovascular demand that climbs fast and stays brutal.
Zone targeted: HIIT
Duration: 12 to 20 minutes
Best for: Explosive power, core stability, full-body conditioning
The sprawl is a burpee without the jump, dropping your hips to the ground in a controlled fall then exploding back to standing. The broad jump is maximum-distance horizontal leap landing in a stable athletic position. Together they create a rhythm of controlled drop, explosive rise, maximum jump, and stable landing that taxes every energy system you have.
Work-to-rest intervals that deliver results:
- Beginner: 20 seconds max effort (as many sprawl-to-broad-jump combos as possible), 40 seconds rest, 10 rounds
- Intermediate: 30 seconds work, 30 seconds rest, 12 rounds
- Advanced: 40 seconds work, 20 seconds rest, 15 rounds
Each combo is one sprawl followed immediately by one broad jump. The moment your feet land from the jump, you drop into the next sprawl. No standing around. No extra steps. The transition should be seamless and the pace should be aggressive enough that your heart rate never drops below zone 4.
Technical checkpoints to avoid injury: Land each broad jump with bent knees and hips back, absorbing force through your posterior chain instead of your knees. Drop into the sprawl with control, not a collapse. Explode up from the sprawl using hip drive, not just arm push.
If your broad jump distance starts shrinking or your sprawl form gets sloppy, you are done. Cap the round and rest. Training through breakdown teaches your nervous system bad patterns and sets you up for strains and tweaks that cost weeks.
This protocol works because it is simple, measurable, and impossible to fake. You either maintain quality output across the prescribed intervals or you do not. Your body adapts to the demand or the demand breaks you down. Respect the signal.
Minimal Equipment Cardio Protocols
This category uses one simple, portable tool to amplify cardiovascular demand. A jump rope, a single kettlebell, or a loaded backpack transforms bodyweight work into higher-output conditioning that builds strength endurance, challenges different energy systems, and travels anywhere you do.
Jump Rope Interval Training
Jump rope is the most underrated cardio tool in existence. It is portable, scalable, brutally effective, and builds foot speed, coordination, and calf endurance while spiking your heart rate into whatever zone you program. Boxers, fighters, and military units use it as a staple for good reason.
Zone targeted: Zone 2 to HIIT depending on structure
Duration: 15 to 30 minutes
Best for: Footwork, coordination, calf endurance, cardiovascular conditioning
The rope provides instant feedback. You either clear it or you do not. Your rhythm, timing, and focus matter, which keeps your brain engaged in a way mindless jogging never will. The cardiovascular demand scales with speed, complexity, and interval structure.
Three interval structures for different training goals:
Steady-state aerobic (Zone 2): 3 minutes of continuous moderate-pace jumping, 1 minute rest. Repeat 6 to 8 rounds. Focus on rhythm and breathing control, not speed.
Threshold intervals (Zone 3): 2 minutes fast-paced jumping (just below the point where you start missing), 1 minute slow pace or rest. Repeat 8 to 10 rounds.
HIIT protocol: 30 seconds maximum speed (as many jumps as possible), 30 seconds rest. Repeat 12 to 20 rounds. Count jumps each round and aim to maintain output.
The rest intervals are built in to allow recovery without letting your heart rate drop completely out of the target zone. If you are fully recovered by the time the next work interval starts, your rest is too long or your work effort is too low.
Progression pathways beyond basic bounce: Once you can hit 10 minutes of continuous basic bounce, add single-leg jumps, double-unders, high knees, or alternating foot patterns to increase neuromuscular demand and keep adaptation happening.
Common mistakes that kill effectiveness: Jumping too high off the ground (you only need to clear the rope by an inch), using arm swing instead of wrist rotation (your shoulders should not be doing the work), and staring at your feet instead of looking forward.
A quality speed rope costs $15 and fits in a pocket. There is no excuse and no easier way to build serious cardiovascular fitness in small spaces or while traveling.
Tabata Intervals
Tabata is a specific HIIT protocol developed by Japanese researcher Dr. Izumi Tabata: 20 seconds of maximum effort followed by 10 seconds of rest, repeated for 8 rounds (4 minutes total). When executed properly with appropriate exercises, it delivers massive cardiovascular adaptation and metabolic conditioning in minimal time.
Zone targeted: HIIT
Duration: 4 minutes per Tabata block, 12 to 20 minutes total with multiple blocks
Best for: Anaerobic capacity, metabolic conditioning, time-efficient cardiovascular training
The effectiveness of Tabata comes from the brutal work-to-rest ratio that keeps your heart rate maximal throughout the 4-minute block. Most people quit mentally before their body actually fails. The protocol forces you past that comfort threshold into genuine physiological adaptation territory.
Exercise selection for effective Tabata blocks:
The movement must be simple enough to maintain form under extreme fatigue, explosive enough to spike heart rate immediately, and sustainable across 8 rounds without injury risk. Complicated movements or heavy loads do not work. Bodyweight exercises that allow maximum output are ideal.
Option 1: Bodyweight Tabata Block
- Exercise: Jumping jacks, high knees, or mountain climbers
- Execution: 20 seconds maximum reps, 10 seconds complete rest, repeat 8 rounds
- Rest between blocks: 2 minutes, then begin next Tabata block with different exercise
- Total session: 3 to 4 Tabata blocks (12 to 16 minutes of total work)
Example exercises for bodyweight Tabata: Burpees, squat jumps, high knees, mountain climbers, jumping jacks, jumping lunges
Option 2: Kettlebell Tabata Block
- Exercise: Kettlebell swings
- Weight: Light enough to maintain hip snap and crisp form across all 8 rounds (typically 12kg to 20kg)
- Execution: 20 seconds maximum swings, 10 seconds rest (set bell down), repeat 8 rounds
- Rest between blocks: 2 to 3 minutes
- Total session: 3 to 5 Tabata blocks
Key execution principles: The first round should feel manageable. By round 4, you should be in serious discomfort. By round 7, you should be questioning your life choices. Round 8 is pure grit. If you finish round 8 feeling fresh, you did not push hard enough during the work intervals.
Count reps each round and write them down. Your goal is to maintain rep count as consistently as possible across all 8 rounds. Significant drop-off (more than 20% reduction from round 1 to round 8) means you either started too aggressively or your current conditioning is not ready for true Tabata intensity.
What most people do: Pick the wrong exercises, fail to push true maximum effort during work intervals, or skip rest days and burn out within two weeks.
What actually works: Choose simple high-output movements, go genuinely hard during the 20 seconds, respect the protocol, and limit true Tabata sessions to 2 to 3 times per week maximum.
Tabata is not something you do casually. It is a specific, research-backed protocol that delivers results when executed with intensity and respect. Anything less is just interval training with a trendy name.
Kettlebell Swings for Conditioning
Kettlebell swings are not a strength exercise, they are a cardiovascular and posterior chain endurance protocol disguised as a ballistic lift. Done with proper intensity and volume, swings build explosive hip power, grip endurance, and aerobic capacity while hammering your glutes, hamstrings, and lower back in ways that transfer directly to real-world movement.
Zone targeted: Zone 3 to HIIT depending on weight and pace
Duration: 15 to 30 minutes
Best for: Posterior chain endurance, grip strength, cardiovascular conditioning, explosive hip power
The swing is a hip hinge, not a squat. Your glutes and hamstrings generate the force. Your arms are ropes connecting the bell to your body. The bell floats to chest or eye level because of hip snap, not arm lift. Get this wrong and you are just doing a sloppy front raise that trains nothing.
High-volume swing protocols for cardiovascular adaptation:
EMOM (Every Minute on the Minute) swings: 20 swings at the top of every minute, rest the remainder. Continue for 10 to 20 minutes. As conditioning improves, increase to 25 or 30 swings per minute.
Descending ladder: 50 swings, rest 60 seconds. 40 swings, rest 50 seconds. Continue descending by 10 reps with 10 fewer seconds rest until you finish at 10 swings. Total volume: 150 swings.
Tabata swings: 20 seconds maximum rep swings, 10 seconds rest, repeat for 8 rounds (4 minutes total). Rest 2 minutes. Complete 3 to 5 Tabata blocks.
The bell weight should allow you to maintain crisp hip snap and controlled breathing throughout the work interval. If your lower back starts rounding or your arms start pulling the bell up instead of guiding it, the weight is too heavy or your volume is too high for current capacity.
Breathing pattern for sustained output: Exhale forcefully through your teeth at the top of each swing (the float point), inhale as the bell drops back down. This pattern keeps your core pressurized, protects your spine, and manages the cardiovascular demand without breath-holding that spikes blood pressure unnecessarily.
Quick win: Start with a 16kg to 24kg bell and EMOM protocol.
Full build: Work up to 30-minute EMOM sessions with a 24kg to 32kg bell, then add weight or switch to more aggressive interval structures.
Swings are self-limiting. The moment your form breaks, your body tells you to stop. Listen. Logging 100 perfect swings beats 200 sloppy ones every single time, and your lower back will thank you for the discipline.
Rucking Intervals
Rucking is walking or hiking with a loaded backpack, and when you structure it with interval intensity instead of steady plodding, it becomes one of the most functional cardiovascular training methods available. It builds work capacity, strengthens your entire posterior chain and core under load, and translates directly to real-world tasks like carrying gear, moving furniture, or hiking with a pack.
Zone targeted: Zone 2 to Zone 3
Duration: 30 to 60 minutes
Best for: Loaded carry endurance, posterior chain conditioning, aerobic base, real-world strength
The load forces your body to work harder at lower speeds, which means you can build serious cardiovascular conditioning without the joint impact of running. Your core stabilizes the shifting weight, your glutes and hamstrings drive each step, and your aerobic system learns to manage sustained effort under resistance.
How to structure ruck intervals for maximum adaptation:
- Load your pack with 20 to 40 pounds (start conservative, add weight as you adapt)
- 5-minute easy-pace warm-up walk to settle the load and check fit
- Interval block: 3 minutes hard pace (fast enough that conversation is difficult), 2 minutes easy pace
- Repeat interval block 6 to 10 times depending on total duration goal
- 5-minute cool-down walk at easy pace
Hard pace does not mean running, it means aggressive walking where your heart rate climbs into zone 3 and your breathing deepens. The load prevents you from going too easy, and the interval structure prevents you from settling into a pace your body adapts to and ignores.
Pack setup that prevents injury: Weight should sit high on your back, close to your shoulder blades, not sagging low toward your hips. Use water jugs, sandbags, or weight plates wrapped in towels. Distribute weight evenly side to side. Tighten straps so the pack does not bounce or shift during movement.
Terrain choice matters. Flat pavement allows you to focus purely on pace and heart rate. Hills add posterior chain loading and cardiovascular demand. Trails add stability and proprioception work. Rotate all three across your training week for complete adaptation.
What most people do: Load too heavy too soon, walk too slow to create cardiovascular demand, or let the pack bounce around creating shoulder and lower back pain.
What actually works: Start with 20 pounds, walk fast enough to elevate heart rate into zone 2 minimum, and tighten your pack like it is part of your body.
Rucking builds durability in a way treadmills and bikes never will. You are training your body to move efficiently under load across time, which is exactly what functional fitness looks like outside a gym.
Slider Mountain Climbers
Sliders (or paper plates on hardwood, socks on smooth floors, or furniture sliders) turn basic mountain climbers into a core-shredding, cardiovascular-spiking protocol that demands full-body tension and controlled movement under metabolic stress. The reduced friction forces slower, more deliberate knee drives that keep your core engaged longer and your heart rate climbing.
Zone targeted: HIIT
Duration: 10 to 15 minutes
Best for: Core endurance, hip flexor strength, cardiovascular conditioning
Standard mountain climbers let you bounce and use momentum to coast through reps. Sliders eliminate that. Every knee drive is deliberate. Every return to plank requires control. Your core has to stabilize against the sliding friction, your hip flexors work continuously, and your cardiovascular system responds to the sustained full-body tension.
Interval structures that maximize slider mountain climber effectiveness:
Tabata sliders: 20 seconds max-rep slider mountain climbers, 10 seconds plank hold, repeat 8 rounds. Rest 90 seconds. Complete 4 Tabata blocks.
EMOM core burner: 30 slider mountain climbers (each leg counts as one rep) at the top of every minute, hold plank for remaining time. Continue 10 to 15 minutes.
Pyramid protocol: 10 reps per leg, rest 20 seconds. 15 reps per leg, rest 20 seconds. 20 reps per leg, rest 20 seconds. Then descend back down: 15, then 10.
The slider should glide smoothly without catching or jerking. If you are on carpet, sliders are required. On hardwood or tile, socks work perfectly. The surface does not matter as long as the movement is controlled and friction is reduced.
Form breakdown signals you are done: Hips sagging below shoulder height, knee drives becoming half-reps that do not reach your chest, or shoulders rounding forward out of proper plank position. The moment any of these happen, stop the set. Rest and reset or call the session complete.
Slider mountain climbers look easy on paper and feel brutal in practice. They are a perfect high-output finisher or standalone HIIT session when you have limited space and time but need serious cardiovascular demand.
Single Kettlebell Complex Flows
A kettlebell complex is a series of movements performed back-to-back without setting the bell down. When structured correctly, complexes deliver strength endurance, metabolic conditioning, and cardiovascular demand in a single continuous flow that teaches your body to manage fatigue across varied movement patterns.
Zone targeted: Zone 3 to HIIT depending on complexity and rest
Duration: 20 to 30 minutes
Best for: Full-body conditioning, movement pattern endurance, grip strength, metabolic stress
The continuous nature of the complex keeps your heart rate elevated while rotating muscular demand across different planes and patterns. Your grip becomes the limiting factor, your breathing has to stay controlled under load, and your cardiovascular system learns to fuel varied output instead of repetitive motion.
Two proven kettlebell complex structures:
The Classic Five: 5 swings, 5 cleans (right arm), 5 presses (right arm), 5 cleans (left arm), 5 presses (left arm), 5 squats (goblet position). That is one round. Rest 60 seconds. Repeat 5 to 8 rounds.
The Flow Complex: 10 swings, 5 snatches (right arm), 5 snatches (left arm), 10 goblet squats, 5 push presses (right arm), 5 push presses (left arm). That is one round. Rest 90 seconds. Repeat 4 to 6 rounds.
Each movement flows directly into the next without setting the bell down. The challenge is maintaining form and breathing control as grip fatigue and metabolic stress accumulate. If you have to set the bell down mid-complex, your weight is too heavy or your conditioning is not ready for that structure yet.
Bell weight selection guide:
- Beginner: 12kg to 16kg allows focus on movement quality while still creating cardiovascular demand
- Intermediate: 16kg to 24kg challenges strength endurance and pushes metabolic systems
- Advanced: 24kg to 32kg requires significant conditioning base and movement proficiency
The rest between rounds is programmed to keep heart rate in zone 3, not to allow full recovery. If you feel completely fresh when the next round starts, cut rest by 15 seconds or increase bell weight.
Breathing strategy under complex fatigue: Match breath to movement rhythm. Exhale during exertion (swing hip snap, press lockout, squat drive up), inhale during the easier phase (swing backswing, press descent, squat descent). Never hold your breath across multiple reps.
Complexes are efficient, brutal, and scalable. They work in a 10×10 space, require one piece of gear, and deliver full-body conditioning that most gym circuits cannot touch.
Improvised Equipment Cardio Protocols
When you do not have access to purpose-built gear, the world becomes your equipment rack. A backpack, water jugs, towels, and stairs are enough to build serious cardiovascular protocols that rival anything a gym offers. This category proves you do not need specialized gear, you need creativity and willingness to suffer.
Backpack Thrusters
Thrusters are a front squat that flows directly into an overhead press, and when you load a backpack and perform them in high-rep conditioning sets, they become a full-body metabolic furnace that hammers your legs, core, shoulders, and cardiovascular system simultaneously.
Zone targeted: HIIT
Duration: 12 to 20 minutes
Best for: Full-body power endurance, metabolic conditioning, functional strength under fatigue
The backpack sits on your back, which changes the loading compared to a front-loaded barbell thruster but creates the same brutal conditioning effect. Your legs drive the squat, your core stabilizes the shifting load, and your shoulders and triceps lock out the press at the top. String 15 reps together and your heart rate will be in zone 5.
Loading and execution protocol:
Pack loading: Start with 20 to 30 pounds using water jugs, books, or sandbags. Tighten all straps so the pack does not shift during the movement.
Movement sequence: Stand with feet shoulder-width apart. Squat down until hip crease is below knee height, keeping chest up and core braced. Drive through heels to stand explosively. As you reach full hip and knee extension, press arms overhead reaching toward the ceiling. Return arms to sides and immediately drop into the next squat.
Interval options based on conditioning level:
- Beginner: 10 thrusters, rest 45 seconds, repeat 8 rounds
- Intermediate: 15 thrusters, rest 30 seconds, repeat 10 rounds
- Advanced: 20 thrusters, rest 20 seconds, repeat 12 rounds
The overhead reach does not need to be a full lockout press if shoulder mobility is limited, but the arms must extend upward with intent. The cardiovascular demand comes from the continuous squat-to-stand movement combined with upper body effort and the loaded pack adding resistance to everything.
Critical form point: The pack will try to pull you backward at the bottom of the squat. Counter this by keeping your chest tall, core braced, and weight distributed across your full foot, not just your heels.
If you cannot complete the prescribed reps in a round with good form, reduce the reps or lighten the pack. Thruster form breakdown under fatigue leads straight to lower back strain and shoulder tweaks. Ego has no place here.
Water Jug Farmer Carry Intervals
Farmer carries are brutally simple: pick up heavy objects, walk with them, put them down, repeat. Using water jugs makes the protocol accessible anywhere while still delivering serious grip endurance, core stability, cardiovascular demand, and full-body tension under load.
Zone targeted: Zone 2 to Zone 3
Duration: 20 to 30 minutes
Best for: Grip endurance, core stability, loaded carry conditioning, postural strength
The instability of water sloshing inside the jugs forces constant micro-adjustments in your grip and core, which increases the training stimulus compared to static weight. Your heart rate climbs as you fight to maintain posture and grip across distance, and your entire posterior chain works to keep you upright under load.
Setup and interval structure:
Jug selection: Two 1-gallon jugs (8 pounds each) for beginners, two 2.5-gallon jugs (20 pounds each) for intermediate, two 5-gallon jugs (40 pounds each) for advanced. Fill them completely so water slosh is minimized but not eliminated.
Carry protocol: Hold one jug in each hand at your sides with arms fully extended, shoulders pulled back and down, core braced. Walk at a controlled pace maintaining upright posture.
Interval structure: 1-minute carry, 1-minute rest (set jugs down, shake out hands and shoulders). Repeat 10 to 20 rounds depending on total duration goal.
Distance can replace time if you have a measured route. Carry for 50 to 100 meters, rest 60 seconds, repeat. The goal is sustained tension and cardiovascular elevation, not speed.
Progression variables to increase demand:
- Increase jug weight by adding more water or switching to larger containers
- Increase carry duration (move from 1-minute to 90-second or 2-minute carries)
- Decrease rest intervals (drop from 60 seconds to 45 or 30 seconds between carries)
- Add instability by using partially filled jugs that slosh aggressively
Your grip will fail before your cardiovascular system does, especially early in training. That is the point. Grip endurance is a limiting factor in real-world strength and carry capacity, and farmer carries address it directly while building aerobic base.
What signals form breakdown: Shoulders rounding forward, torso leaning to one side, or jugs bumping against your legs. Any of these mean your stabilizers are fatigued and you are compensating with poor mechanics. Set the jugs down, rest fully, and resume or call the session.
Farmer carries translate directly to life outside training. Carrying groceries, moving gear, hauling tools, all of it becomes easier when you build loaded carry endurance with simple water jugs and deliberate effort.
Towel or Sock Slider Push-Up Variations
Push-ups are foundational, but when you add sliders (or towels on hardwood, socks on smooth floors) to the equation, you create instability and increased range of motion that turns a basic movement into a cardiovascular and core-demanding protocol that builds upper body endurance and metabolic stress.
Zone targeted: Zone 3 to HIIT depending on variation and volume
Duration: 12 to 18 minutes
Best for: Upper body endurance, core stability, shoulder health, metabolic conditioning
The sliders allow your hands or feet to move independently, which forces your core to work harder to stabilize against rotational forces and your shoulders and chest to control eccentric and concentric phases across a longer range of motion than standard push-ups allow.
Three slider push-up variations for different training stimulus:
Slider fly push-ups: Hands on sliders in standard push-up position. As you lower into the push-up, slide your hands out wide into a fly position. Press back up while sliding hands back together. Each rep is one full fly-to-press cycle. This variation hammers chest and shoulders with extended time under tension.
Slider archer push-ups: Hands on sliders. Lower down while sliding one arm out straight to the side, keeping the working arm close to your body in a standard push-up path. Press back up while sliding the extended arm back in. Alternate arms each rep. This builds unilateral pushing strength and core anti-rotation.
Feet-elevated slider mountain climber push-ups: Feet on sliders, hands on ground in push-up position. Perform one push-up, then perform 4 mountain climbers (2 per leg), then another push-up. This combination keeps heart rate spiked while rotating between pushing strength and core conditioning.
Each variation can be structured into interval protocols:
EMOM format: 10 to 15 reps of chosen variation at the top of every minute, rest the remainder. Continue 10 to 12 minutes.
Tabata format: 20 seconds max reps, 10 seconds rest, 8 rounds (4 minutes total). Rest 2 minutes, repeat for 3 to 4 Tabata blocks.
Straight sets: 3 sets of 15 to 20 reps with 60 seconds rest between sets.
Surface and slider pairing guide: Hardwood or tile floors work with towels or socks. Carpet requires furniture sliders or dedicated workout sliders. Concrete or rough surfaces do not work. The surface must allow smooth gliding without catching.
Form standards remain the same as regular push-ups: body in straight line from head to heels, core braced, full range of motion where chest nearly touches the floor at the bottom. The moment your hips sag or your range of motion shrinks to half-reps, the set is over.
Slider push-up variations look like party tricks until you try to complete 50 total reps with quality form. Then they reveal themselves as legitimate upper body conditioning tools that spike heart rate and build endurance that transfers to every pressing movement you do.
Stair or Step-Up Interval Pyramids
Step-ups are underrated because they look too simple to be effective, but when programmed with aggressive interval pyramids using a stair, box, or sturdy bench, they become a unilateral leg burner that builds cardiovascular endurance, glute and quad strength, and balance under fatigue.
Zone targeted: Zone 3 to HIIT depending on pace and step height
Duration: 15 to 25 minutes
Best for: Unilateral leg strength, balance, cardiovascular conditioning, knee stability
Each step-up requires your lead leg to drive your entire bodyweight upward without momentum assistance from the trailing leg. This isolates muscular imbalances, builds stability through the knee and ankle, and creates cardiovascular demand that climbs as volume accumulates.
Pyramid structure for step-up conditioning:
Step height selection: 12 to 18 inches for most people (standard stair height to park bench). Higher steps increase glute recruitment and difficulty.
Ascending pyramid: 5 step-ups per leg, rest 30 seconds. 10 per leg, rest 30 seconds. 15 per leg, rest 30 seconds. 20 per leg, rest 30 seconds. Total volume: 100 step-ups.
Descending pyramid: 20 per leg, rest 45 seconds. 15 per leg, rest 45 seconds. 10 per leg, rest 45 seconds. 5 per leg, rest 45 seconds. Total volume: 100 step-ups.
Full pyramid: Ascend from 5 to 20 in increments of 5, then descend back down. Rest 30 to 45 seconds between sets. Total volume: 200 step-ups.
Pace matters. These are not slow, controlled strength reps. They are conditioning reps performed with intent and continuous rhythm that keeps your heart rate elevated. Step up, drive through your heel, stand fully at the top, step down with control, immediately repeat on the same leg until reps are complete, then switch legs.
Common technical errors that kill effectiveness:
- Pushing off the ground with your trailing leg instead of driving entirely through the lead leg
- Not standing to full hip extension at the top of each rep
- Leaning forward excessively instead of maintaining upright torso
- Letting your knee cave inward during the drive phase
If you cannot maintain these standards across the prescribed volume, reduce the reps per set or lower the step height. Quality matters more than numbers, especially when you are training unilateral movement under cardiovascular fatigue.
Add load once bodyweight pyramids feel manageable. Hold a single water jug at chest height, wear a loaded backpack, or carry a kettlebell. The added resistance increases cardiovascular demand and builds strength endurance simultaneously.
Backpack Bear Crawls and Crab Walks
Ground-based crawling patterns with a loaded backpack are primal, brutal, and phenomenally effective for building cardiovascular conditioning, shoulder stability, core strength, and movement capacity that most people have completely lost since childhood.
Zone targeted: Zone 3 to HIIT depending on pace and load
Duration: 10 to 20 minutes
Best for: Shoulder health, core endurance, full-body coordination, cardiovascular conditioning
Bear crawls (moving forward on hands and feet with hips low and knees off the ground) and crab walks (moving backward or forward in a reverse tabletop position) force your body into unfamiliar positions under load, which creates massive metabolic demand, neuromuscular fatigue, and cardiovascular stress in surprisingly short distances.
How to structure loaded crawl conditioning sessions:
Pack loading: 15 to 30 pounds depending on conditioning level. The pack should be tight against your back and not shift during movement.
Interval protocol: 30 seconds bear crawl forward, 30 seconds rest. 30 seconds crab walk backward, 30 seconds rest. Repeat this 2-movement cycle 8 to 12 times (16 to 24 total work intervals).
Distance protocol: Measure or mark 20 to 50 meters. Bear crawl the full distance, rest 60 seconds. Crab walk the full distance, rest 60 seconds. Repeat 5 to 8 rounds.
Your shoulders, core, and hip flexors will burn before your cardiovascular system redlines, but your heart rate will climb into zone 3 and spike into HIIT territory as you fight to maintain pace and position under the loaded pack.
Bear crawl technique: Hands under shoulders, feet hip-width apart, hips low (roughly knee height), knees hovering just off the ground. Move opposite hand and foot simultaneously (right hand, left foot). Keep your core braced and back flat, not arched or rounded.
Crab walk technique: Sit on the ground, place hands behind you with fingers pointing toward your feet, lift hips into reverse tabletop position. Move backward or forward using opposite hand and foot. Keep hips elevated throughout, do not let them sag toward the ground.
The loaded pack shifts your center of gravity and increases the stability demand on your shoulders and core. If the pack starts bouncing or shifting, you are moving too fast or your straps are too loose. Tighten the setup and control your pace.
What most people do: Rush through reps with hips too high (turning bear crawls into awkward walks) or let hips sag during crab walks (eliminating the core and glute engagement).
What actually works: Slow, controlled movement with perfect position, where every step is deliberate and your core stays braced throughout.
Crawling patterns look ridiculous and feel humbling, which is exactly why they are valuable. They expose weaknesses in stability, coordination, and conditioning that traditional cardio never touches.
You have 15 proven cardio protocols that require no gym, no excuses, and no compromises. Each one builds real cardiovascular capacity using nothing more than your body, basic gear, or items you already own.
The gym is optional. Your conditioning is not. These workouts travel with you, scale with your progression, and deliver adaptations that last decades when you treat them with consistency and respect. Pick the ones that match your current access and goals, log your sessions, and build the aerobic engine that supports everything else you do


ABOUT THE AUTHOR
Carlos Grider is a former U.S. Marine, CrossFit Level 1 trainer, certified personal trainer, and the creator of Forge the Flow. After nearly a decade supporting combat operations and special operations in austere environments — and another decade traveling across 65+ countries as a nomad and adventure athlete — Carlos distilled everything he learned about staying strong, capable, and resilient without a gym into the Forge the Flow training system. He has trekked solo to Everest Base Camp, surfed Bali through the pandemic, trained Muay Thai in Thailand, and run self-guided marathons across four continents — all maintained on minimalist training built for real life. He writes about the fitness methods that actually travel.
Click here to learn more about Carlos's story.